3. Blink LED
In this project, we’ll build the classic “Hello, World!” of hardware: a blinking LED using Icestudio’s blocks.
What You Will Need
- Soan Papdi FPGA Board ➜ Link
- USB Type-C data cable
Select the Board
Ensure your target board is set to Soan Papdi in the bottom-right corner.
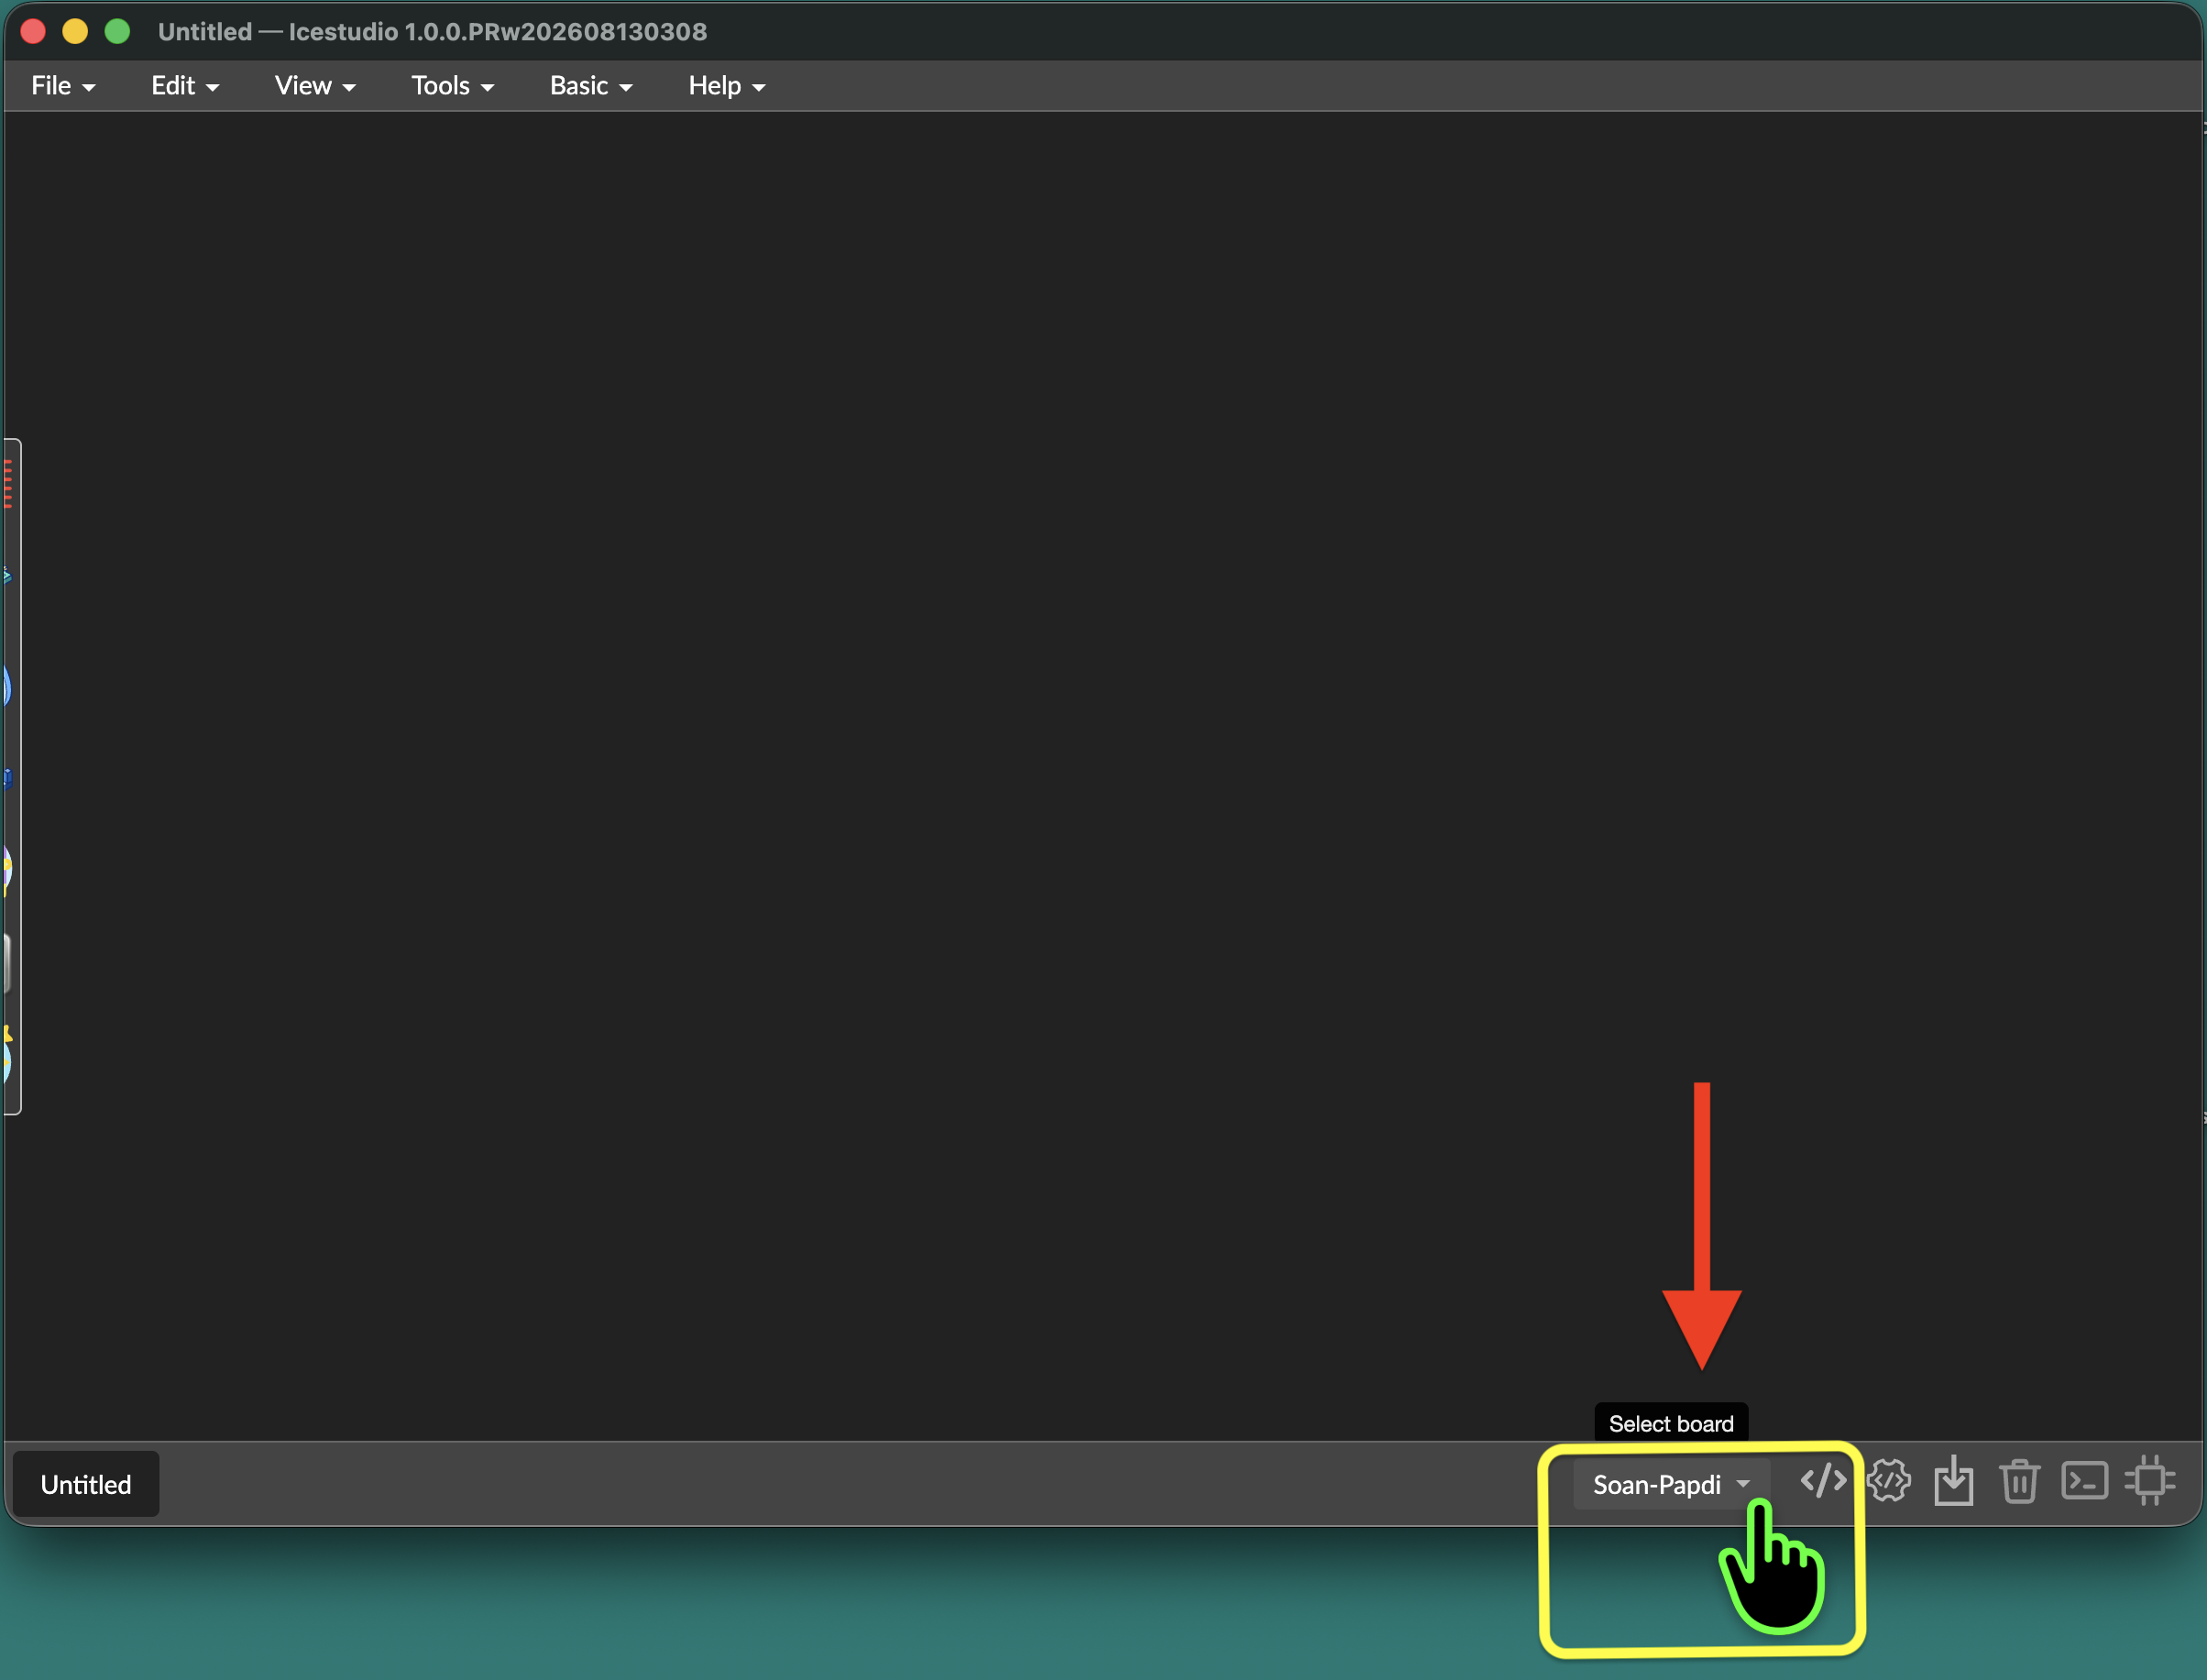
If you haven’t set this up yet, see the detailed steps in Example 1: Getting Started.
Open the LED Blink Example
Open the LED Blink example by navigating to:
File → Examples → Basic → 04. One LED Blink.ice
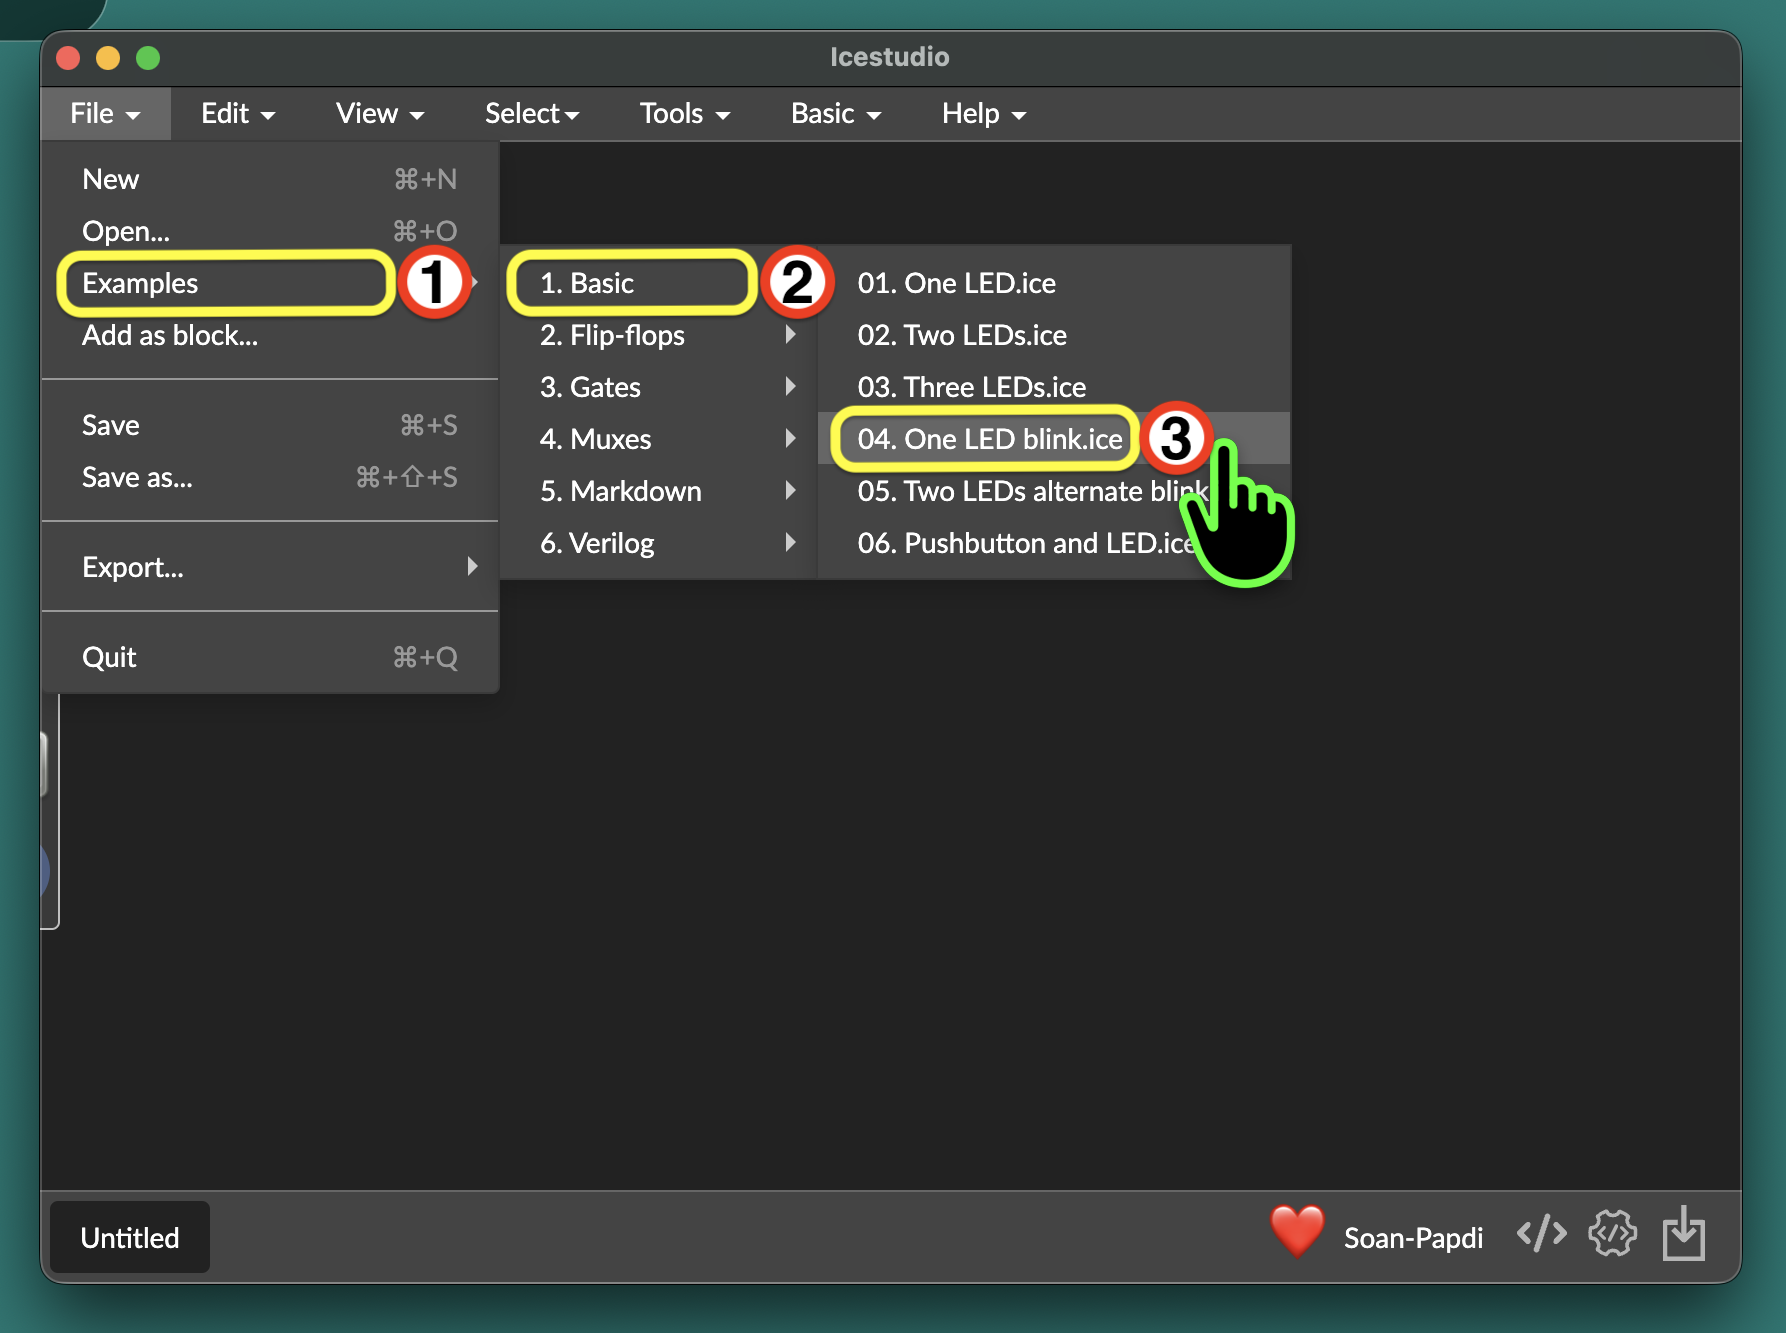
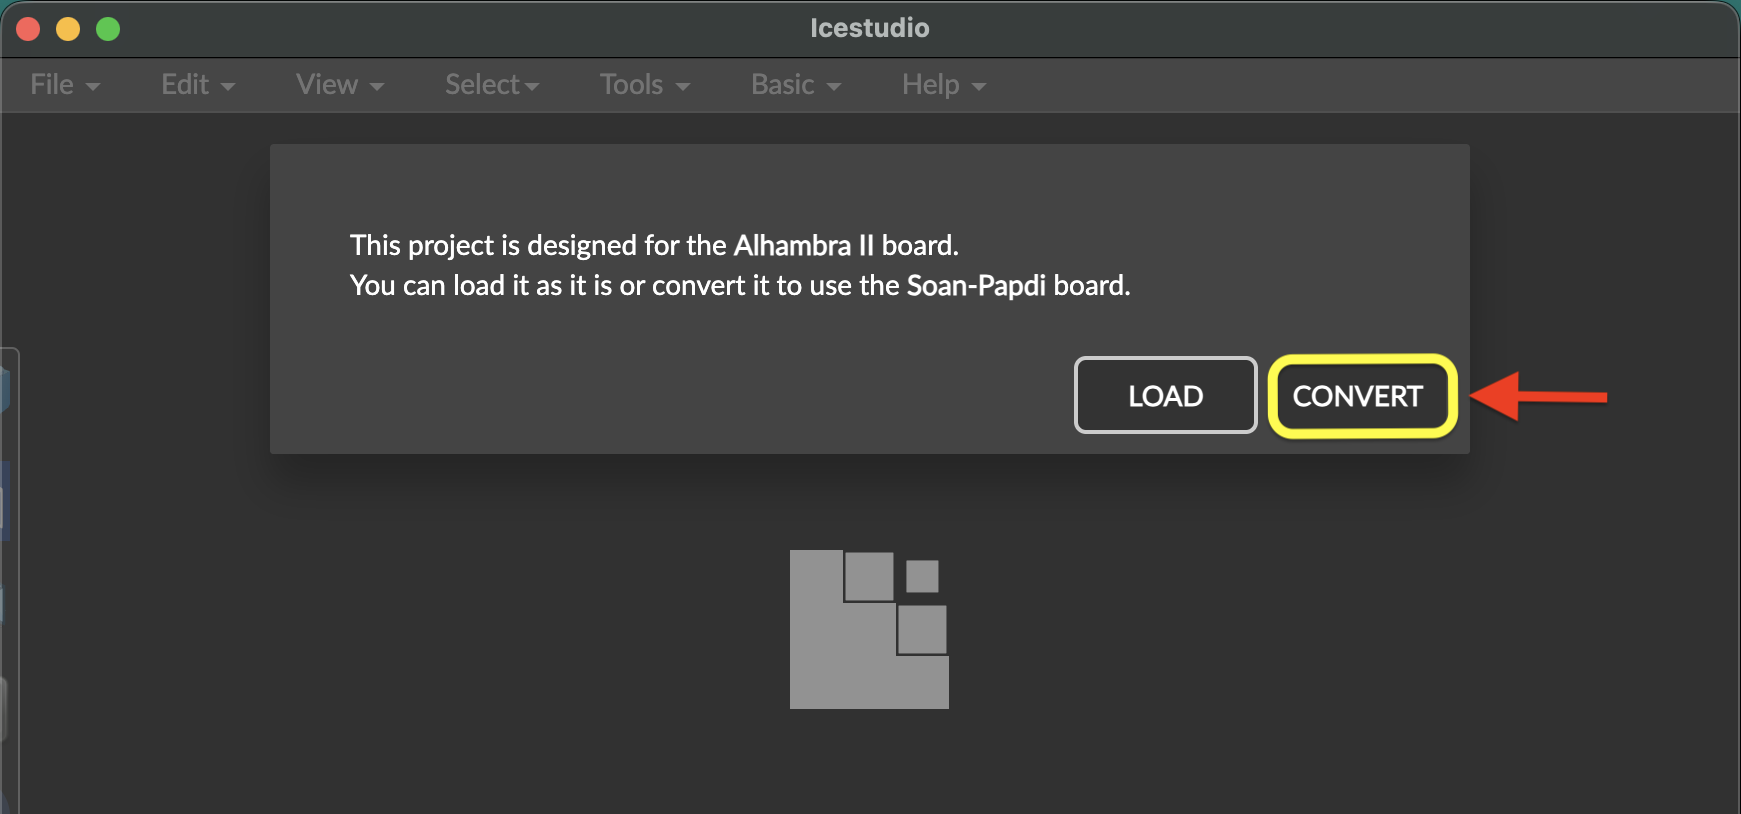
When you open this example, Icestudio will prompt you to convert the pin mappings for Soan Papdi:
- Click on
Convertto continue.
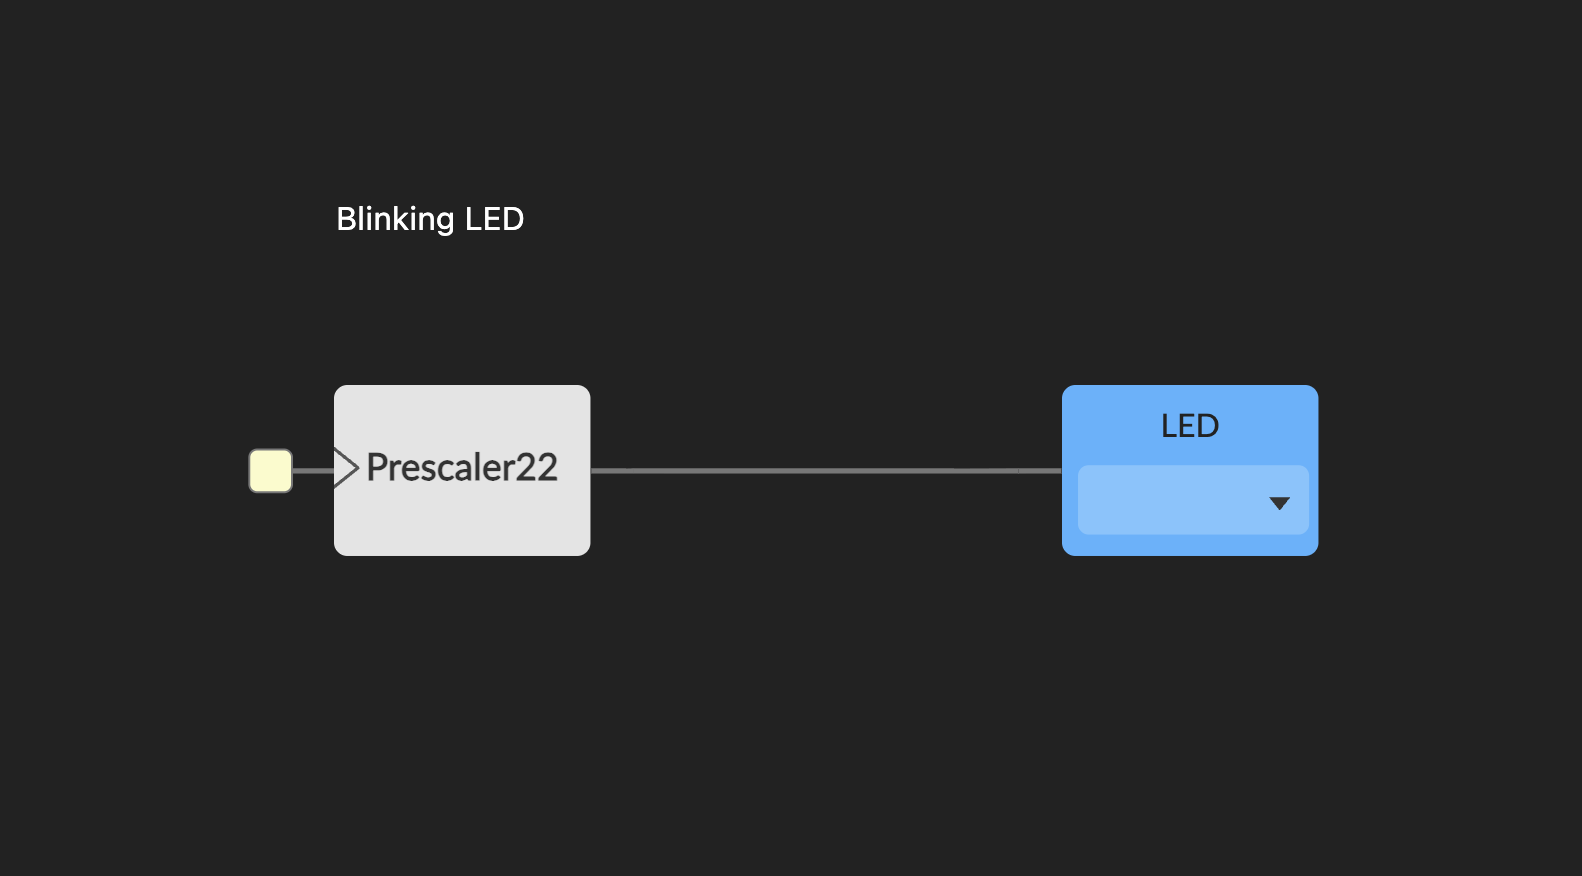
Understand the Blocks
How the Circuit Works?
Input Clock (Yellow Square): Provides the heartbeat of the FPGA—a fast 12 MHz signal ticking 12 million times every second.Prescaler22: Acts like a gear reducer. It uses a 22-bit counter to divide the clock by $2^{22}$, dropping 12 MHz down to a human-visible blinks per second.LED Block: Connects directly to the physical LED pin on the board, flashing the light on and off in sync with the slowed pulses.
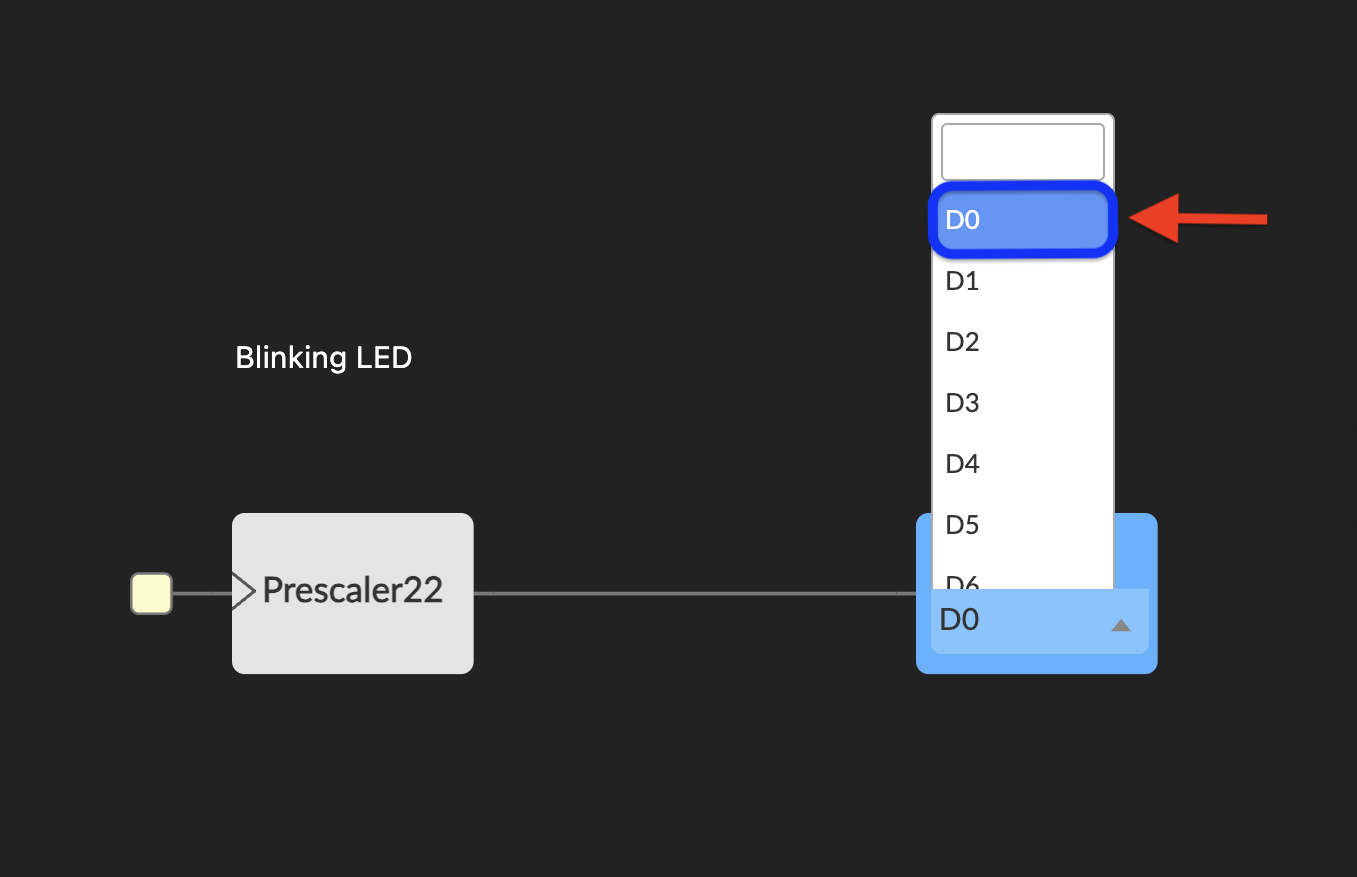
Choose the LED pin:
Select the pin you would like to blink. In this tutorial, we’ll use D0. but you can choose any other output led.
Build Your Project
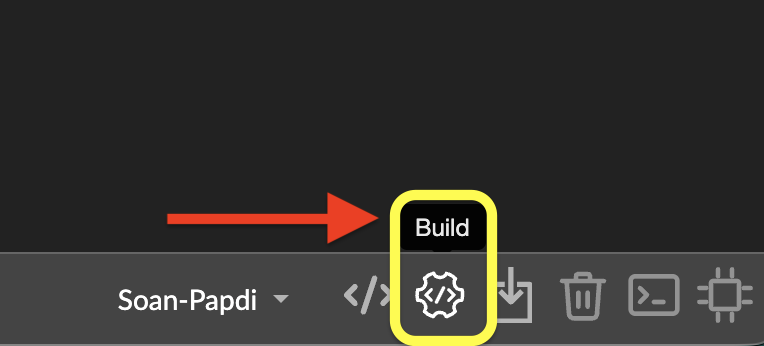
Click the Build button in the bottom-right corner.
Upload Your Project
Your bitstream is ready. Now, let’s upload it to the Soan Papdi.
Step A: Enter Programming Mode
Put your board into programming mode before flashing. If you haven’t done this before, follow the steps in Example 1: Getting Started.
Soan Papdi in programming mode - blinking white LEDs on S0, S1, and S2.
If your project ever fails to upload, always check if you remembered to put the board in programming mode first!
Now, let’s send our project to the board.
Step B: Upload the Bitstream
- Click the Upload icon in the bottom-right corner of iCEstudio.
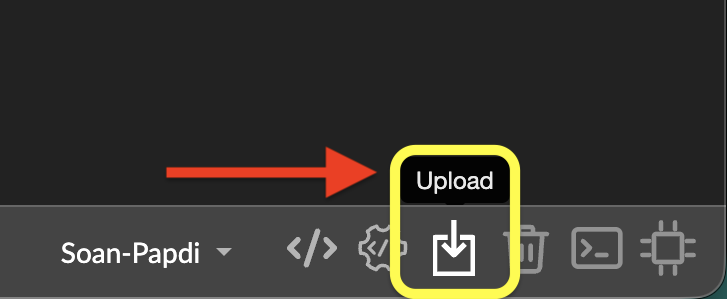
- Once the upload is complete, press the RESET button on the board to start running your new design.
Your LED should now be blinking!